Introduction
Why Cook It in Your Dutch Oven for Perfect Baking Results
Theres something magical about using cast iron cookware for baking. When you cook it in your Dutch oven, heat surrounds your food evenly, locking in moisture and building a golden crust thats hard to resist. This slow baking method creates bakery-quality results right at home without fancy equipment. Many home cooks overlook these benefits, yet the even heat cooking benefit of a Dutch oven transforms ordinary recipes into memorable meals.
Who Should Try This Cooking Method
This baking technique suits a wide range of home cooksfrom beginners eager to try gluten-free Dutch oven baking to seasoned chefs who love rustic, artisanal flavors. If you want to explore cast iron baking tips and want consistent baking with minimal fuss, this method will quickly become your new favorite.
What Sets This Dutch Oven Baking Technique Apart
Unlike standard baking on open trays, cooking it in your Dutch oven traps steam and maintains heat evenly. This mimics professional steam ovens, a feature few recipes explain well. The heavy lid and walls aid in moisture retention, resulting in a crispy crust and tender crumb that typical pans cant match. Say goodbye to common Dutch oven baking mistakes caused by improper temperatures or timing.
Key Highlights
Achieve Consistent, Even Heat Distribution for Superior Texture
The thick cast iron evenly distributes heat throughout your dish, preventing hot spots that cause uneven browning. This even heat cooking benefit ensures your bread or casserole cooks through perfectly, delivering a golden crust and soft interior each time. With the slow baking method in a Dutch oven, moisture stays balanced, enhancing both flavor and texture.
Versatility for Sweet and Savory Baking
From rustic artisan breads to savory stews and even slow-baked desserts, baking in Dutch oven cookware adapts to many recipes. Trapping steam keeps casseroles creamy and breads crusty, while locking in the complex aromas of herbs and spices. It also opens doors to experimenting with gluten-free Dutch oven baking and other dietary preferences.
Who Should Use Caution
Dutch ovens are heavy, especially cast iron models. Those with limited wrist strength or joint issues should handle them with care and use secure oven mitts. Avoid sudden temperature changes to protect your cookwares surface, and always place your oven-safe trivet or mat nearby for safe resting spots.
Ingredients & Preparation
| Prep time | Cook time | Total time | Servings | Calories | Diet tags |
|---|---|---|---|---|---|
| 15 minutes | 45 minutes | 1 hour | 6 | 280 | Vegetarian, Gluten-Free (optional) |
Full Ingredient List with Substitution Notes
- 3 cups all-purpose flour (substitute gluten-free flour blend for gluten-free dutch oven baking)
- 1 tsp active dry yeast
- 1 tsp salt
- 1 cups warm water (110F/43C)
- Optional: fresh herbs or seeds for topping (e.g., rosemary, sesame seeds)
Choose your flour based on dietary needs. Organic all-purpose flour enhances flavor but is optional. For topping, use fresh herbs for a bright aroma or seeds for an earthy crunch.
Equipment Needed
A heavy Dutch oven with a tight-fitting lid is essential. Cast iron is best for heat retention, but enameled Dutch ovens work well too, though they may affect cooking time slightly. A reliable kitchen thermometer helps maintain accurate oven temperature during baking.
Tips for Choosing the Best Ingredients
Fresh yeast guarantees active rising, leading to lighter texture. Look for high-protein flours for better gluten development unless gluten-free baking is required. Herbs and seeds should be fresh for maximum aroma and crunch.
Step-by-Step Instructions
Step 1 Prep Ingredients and Dough
Combine flour, yeast, and salt in a large bowl. Add warm water (about 110F) and stir until just combined; dough will be sticky. Cover with plastic wrap and let rise at room temperature for 12 to 18 hours. This slow baking method develops flavor deeply and improves texture.
Step 2 Preheat Dutch Oven and Bake (450F for 30 mins)
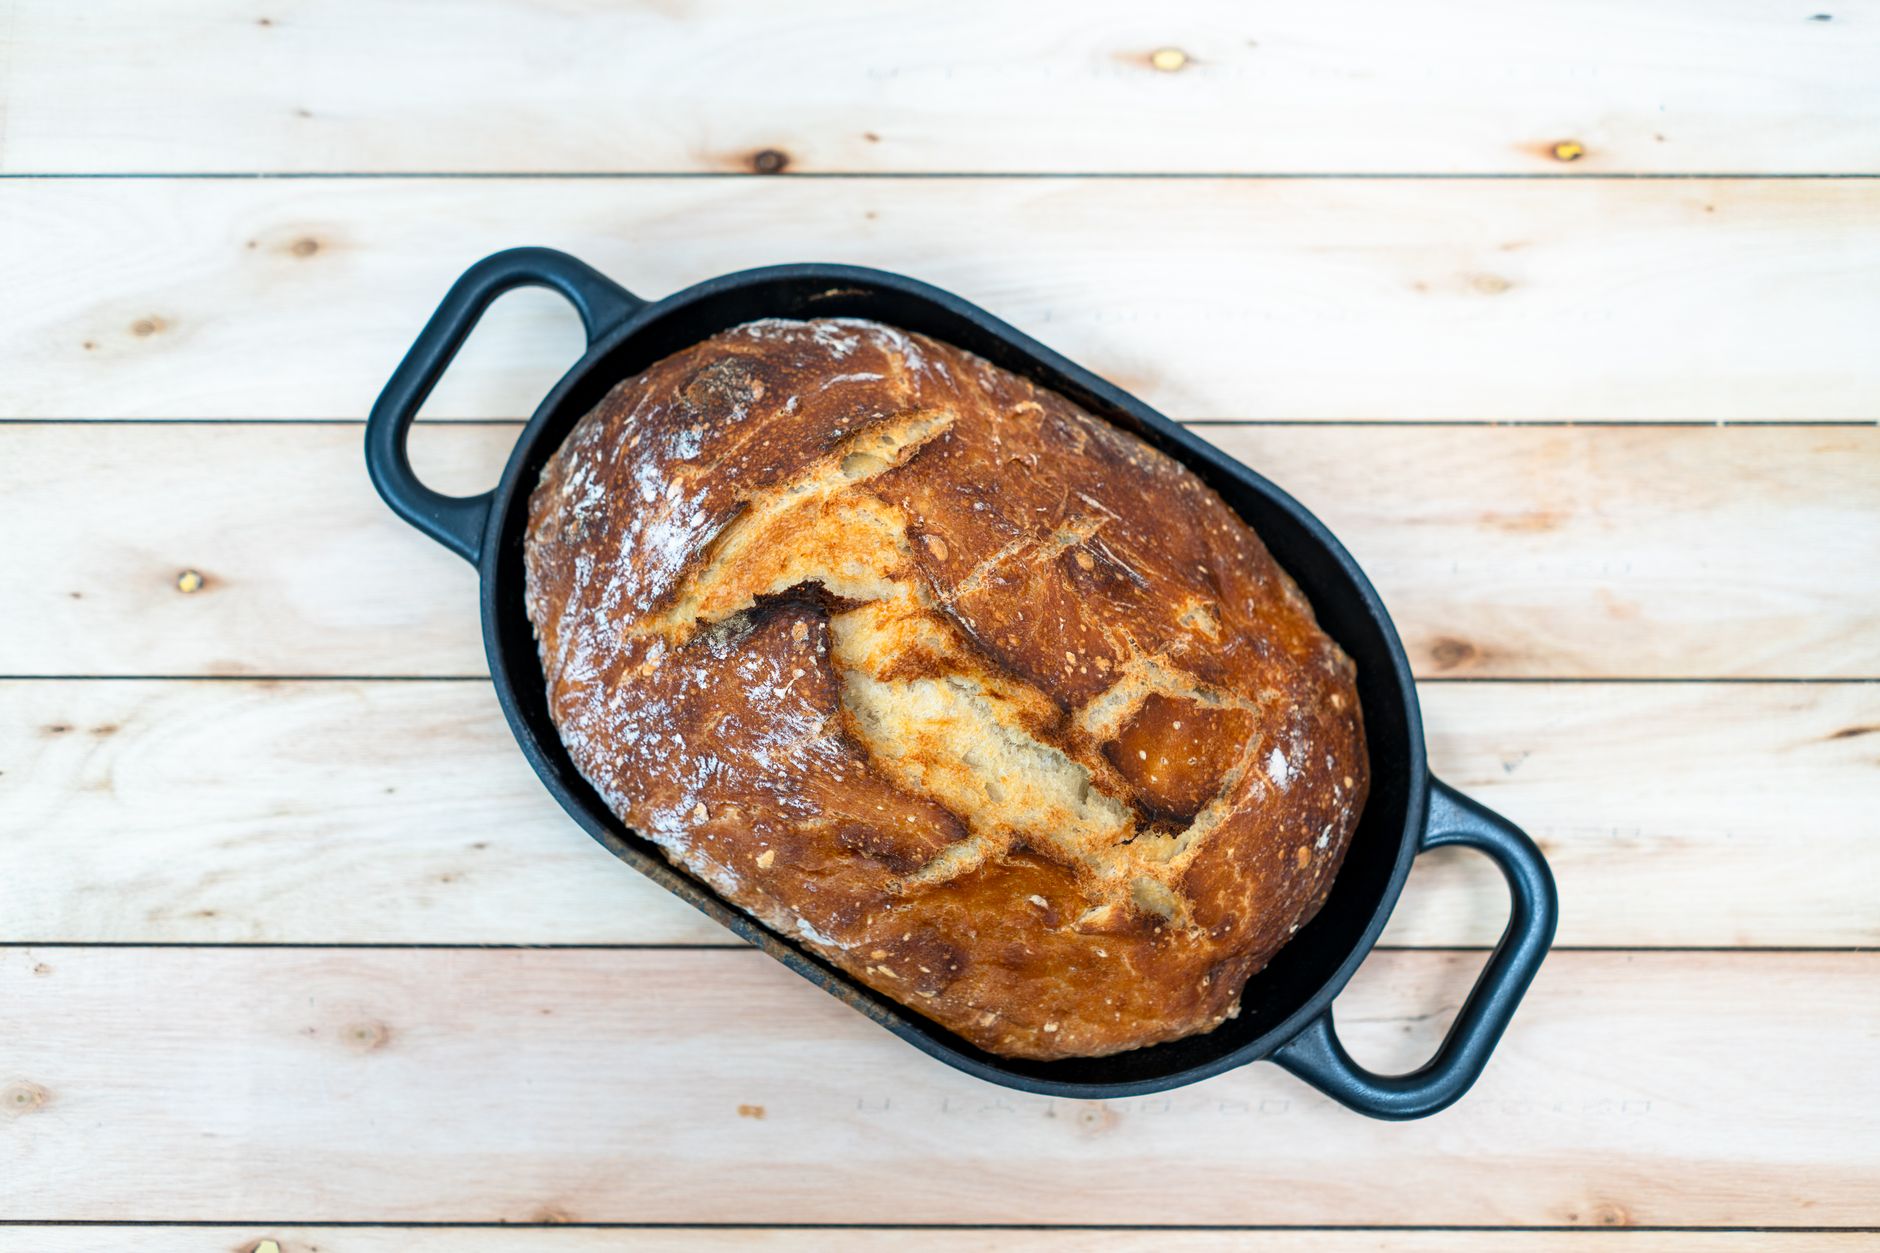
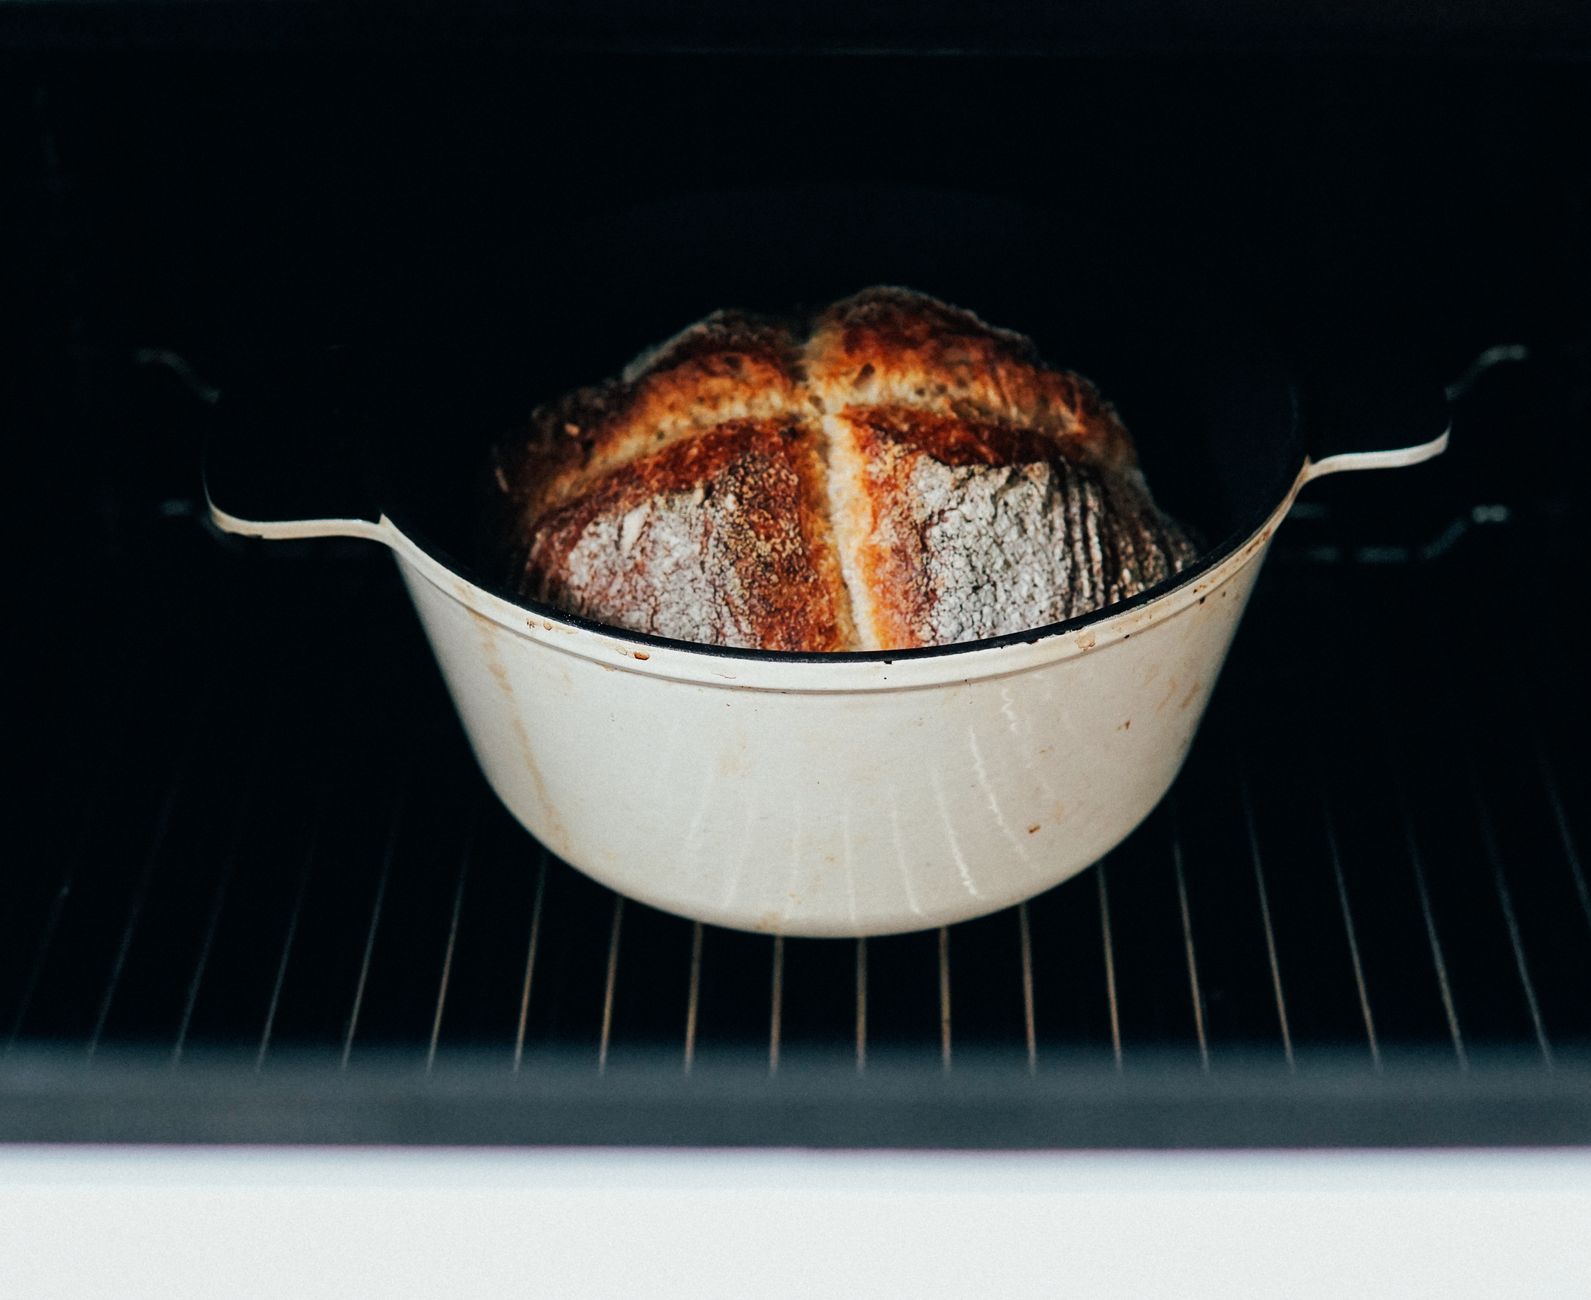
Place your empty Dutch oven, including the lid, inside your cold oven. Preheat oven to 450F (232C) and let the pot heat for 30 minutes. Carefully transfer dough onto parchment paper, then lower it into the hot Dutch oven. Cover with the lid and bake for 30 minutes to trap steam and create a moist environment.

Step 3 Remove Lid to Finish Baking
After 30 minutes, carefully remove the lid and bake the bread uncovered for another 15 minutes. This step lets the crust turn golden and crispy. Avoid opening the lid early, as the trapped steam is crucial for a tender crumb and thick crust.
Step 4 Cool Before Serving or Storing
Remove the bread and place it on a wire rack to cool completelyabout 1 hour. Cooling stops the cooking process and keeps the crumb moist. Store bread in an airtight container or paper bag to maintain a crunchy crust.
Variations & Substitutions
Popular Variation: Gluten-Free Dutch Oven Bread
Swap all-purpose flour for your favorite gluten-free blend. Add 1 tsp of xanthan gum to improve elasticity. Gluten-free Dutch oven baking produces a crusty exterior but may have a more crumbly inside. Adjust liquid slightly for best results.
Ingredient Swaps and Outcomes
Replacing water with milk or buttermilk results in a softer crust and richer flavor but slightly less crispiness. Adding olives, nuts, or dried fruits adds savory or sweet notes, changing taste and baking time subtly.
Adjusting Sweetness or Herbs to Taste
For sweeter breads, add 12 tbsp honey or sugar. Reduce salt by half for delicate flavor profiles. Fresh rosemary, thyme, or garlic create warm, earthy aromas perfect alongside crusty bread.
Storage & Shelf Life
Refrigerator Storage
Store bread in a sealed plastic bag or airtight container at room temperature for 34 days. Refrigeration can dry bread quickly, so only refrigerate if needed.
Freezer Option
Slice cooled bread and freeze in ziplock bags or wrap tightly with foil. Bread keeps well frozen for up to 3 months. Thaw at room temperature for 23 hours before serving.
Make-Ahead Batches
Double or triple the dough recipe and bake multiple loaves. Cool fully before freezing. You can refrigerate shaped dough for up to 24 hours before baking.
Pro Tips & Troubleshooting
Handle Dutch Oven Safely and Prevent Mess
Always use thick oven mitts; Dutch ovens become very hot and heavy. Line the bottom with parchment paper before baking to prevent sticking. Never place cold liquid on a hot cast iron pot to avoid damage from thermal shock.
Fix Common Issues Pale Crust or Dense Texture
A pale crust usually means oven temperature is too low or lid removal was premature. Use an oven thermometer to verify heat. Dense texture indicates under-proofed dough; ensure the dough rises for the full 12-18 hours or until it doubles in size.
Expert Upgrade Use a Tray of Water for Extra Steam
Place a rimmed pan with hot water on the ovens bottom rack during baking. This increases humidity, enhancing crust crunchiness and improving rise. Its an extra step but delivers bakery-worthy results.
When is the best time to cook it in your Dutch oven?
The best time is when you can dedicate about an hour from start to finish, including rising and baking. Afternoon or evening sessions work great for slow rise and overnight fermentation, giving you fresh bread for dinner or breakfast.
Can I make a big batch and store it?
Yes. Doubling or tripling the recipe is easy. Bake multiple loaves and freeze cooled bread individually. This method saves time and keeps fresh bread on hand for busy days.
Fresh yeast or powdered yeast which is better?
Both types work well. Fresh yeast tends to give a quicker, more active rise while powdered yeast offers longer shelf life and easier measuring. Choose based on availability and personal preference.
Is Dutch oven baking safe for pregnant women or kids?
Yes, its safe. Just be cautious handling heavy pots and very hot cookware to avoid burns. Use sturdy oven mitts and place pots securely during baking.
How often can I bake this way?
As often as you like. Many put their Dutch oven to work multiple times weekly thanks to its versatility. Its excellent for breads, casseroles, and slow-cooked meals.
Why does my bread taste bitter?
Bitterness often comes from using too much yeast or using old, expired yeast. Also, overly salty dough or burnt crust can contribute. Check ingredient freshness and measure precisely.
What pairs well with Dutch oven bread?
Butter, quality olive oil, hearty soups, and sharp cheeses complement the rustic crust and tender crumb beautifully. Try it alongside slow cooker stews or vegetable roasts for a cozy meal.
More Recipes You Will Love
Explore the best dutch oven cookbook for more creative ideas using your cast iron cookware.
For a healthy twist, try these Healthy dutch oven recipes chicken that pair well with fresh, crusty bread.
Discover more Healthy dutch oven recipes to keep your meals nutritious and flavorful while utilizing this versatile pot.
Conclusion
Cooking it in your Dutch oven delivers a perfect balance of crispy crust and tender crumb with little effort. This method harnesses cast irons even heat distribution and moisture retention to transform simple ingredients into memorable bread and dishes. Try this technique soon, and share your experiences or rate your favorite recipes below for others to enjoy.
FAQs
When is the best time to cook it in your Dutch oven?
The best time is when you can dedicate about an hour, including dough rising and baking. Afternoons or evenings suit slow rises or overnight fermentation, delivering fresh bread for dinner or breakfast.
Can I make a big batch and store it when cooking in my Dutch oven?
Yes, you can easily double or triple the recipe and bake multiple loaves. Cool the bread fully before freezing for convenient storage and to keep fresh bread available on busy days.
Which yeast is better for Dutch oven baking, fresh or powdered?
Both yeast types work well. Fresh yeast offers a quicker, more active rise, while powdered yeast provides longer shelf life and easier measuring. Choose based on availability and preference.
Is Dutch oven baking safe for pregnant women and children?
Yes, it is safe. However, be cautious when handling the heavy, hot cookware to prevent burns. Use sturdy oven mitts and ensure pots are placed securely while baking.
Why does my Dutch oven bread sometimes taste bitter?
Bitterness usually results from too much yeast, expired yeast, excessive salt, or burnt crust. Check freshness of ingredients and measure accurately to avoid this issue.